 Skipper
Navigate
•All boatersIALA Buoyage System: A and B
Learn how to identify IALA navigation buoys and marks, understand Regions A and B, recognise cardinal marks, and navigate safely through marked channels.
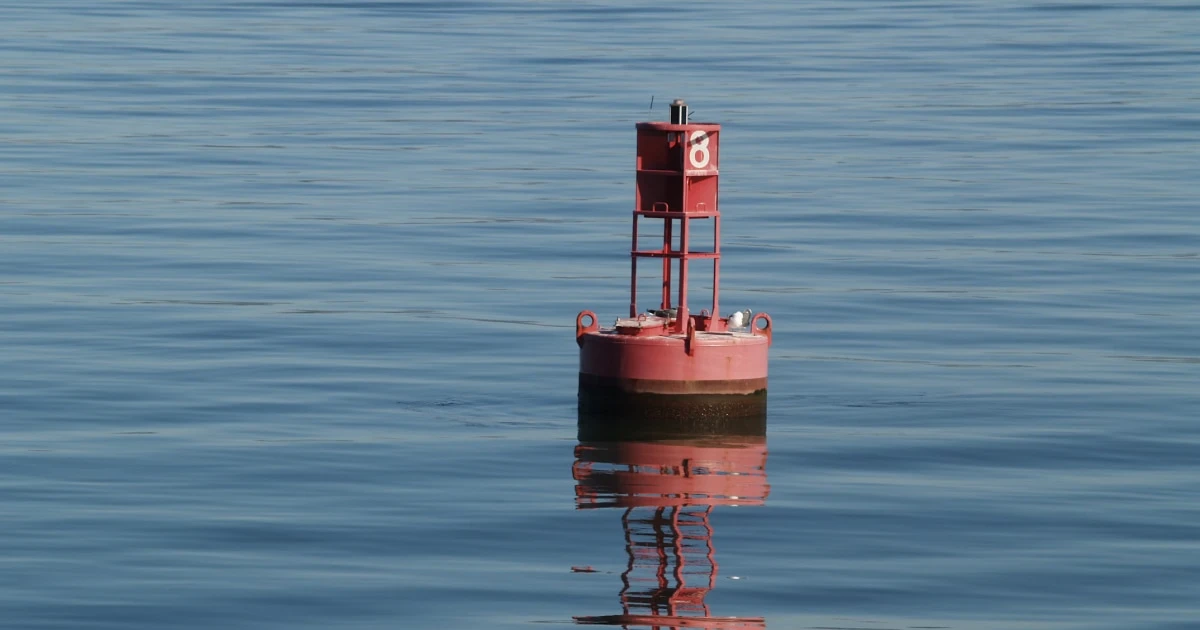
IALA Buoyage System: A and B
You are approaching a harbour entrance and see a line of red and green buoys. Which side should you pass? What if you are navigating in the United States rather than France? And what does a black-and-yellow buoy with two cones mean?
The IALA Maritime Buoyage System provides a common framework for interpreting navigation marks around the world. It helps boaters identify channel boundaries, locate safe water, recognise hazards, and understand other navigational information.
The most important distinction to learn first is that there are two buoyage regions, IALA Region A and Region B. Their lateral mark colours are reversed, but the other main mark categories follow the same basic system.
This guide explains how to recognise each type of mark and use it as part of a safe navigation plan.
1. What is the IALA buoyage system?
IALA is the international organisation responsible for developing standards and recommendations for marine aids to navigation. Its Maritime Buoyage System provides a consistent way to mark navigable channels, hazards, and other features relevant to navigation.
Marks may be floating buoys or fixed structures. They communicate information through a combination of:
- Colour: Often the first visual clue.
- Shape: Such as cylindrical, conical, spherical, or pillar-shaped.
- Topmark: A distinctive shape mounted above the mark.
- Light: Its colour, rhythm, and period when a light is fitted.
- Charted position and context: The mark’s meaning must be interpreted alongside nautical charts and the surrounding geography.
Not every buoy has a light or topmark. When one characteristic is missing or difficult to see, the other available information becomes particularly important.
The system includes five principal categories of marks:
| Mark category | Main purpose |
|---|---|
| Lateral marks | Indicate the port and starboard sides of a channel or route |
| Cardinal marks | Indicate the direction of safe water relative to a danger |
| Isolated danger marks | Mark a limited danger with navigable water around it |
| Safe water marks | Indicate navigable water around the mark |
| Special marks | Identify a particular area or feature referenced in nautical documents |
Emergency wreck marking buoys are also used in the circumstances specified by the relevant standards.
2. IALA Region A vs Region B
The main difference between Regions A and B concerns lateral marks: the marks used to indicate the sides of a channel.
        <text color="secondary" size="sm">Generally a cylindrical or can-shaped mark.</text>
      </box>
    </row>
    <row align="center" gap={2}>
      <box background="#16834A" radius="md" padding={2} align="center" justify="center" size="52px">
        <icon name="triangle" color="#FFFFFF" size="xl" />
      </box>
      <box gap={1} flex="1">
        **Green = starboard**

        <text color="secondary" size="sm">Generally a conical mark.</text>
      </box>
    </row>
  </box>
</grid-item>
<grid-item>
  <box border radius="lg" padding={3} gap={2}>
    <title size="lg">Region B</title>
    <row align="center" gap={2}>
      <box background="#16834A" radius="md" padding={2} align="center" justify="center" size="52px">
        <icon name="circle" color="#FFFFFF" size="xl" />
      </box>
      <box gap={1} flex="1">
        **Green = port**

        <text color="secondary" size="sm">Generally a cylindrical or can-shaped mark.</text>
      </box>
    </row>
    <row align="center" gap={2}>
      <box background="#D92D20" radius="md" padding={2} align="center" justify="center" size="52px">
        <icon name="triangle" color="#FFFFFF" size="xl" />
      </box>
      <box gap={1} flex="1">
        **Red = starboard**

        <text color="secondary" size="sm">Generally a conical mark.</text>
      </box>
    </row>
  </box>
</grid-item>Where are the two regions used?
- Region A: Includes metropolitan France, the United Kingdom, much of Europe, and many other parts of the world.
- Region B: Includes the United States, Japan, and several other countries in the Americas and Pacific.
France also has overseas territories where the applicable region differs from metropolitan France. Under French regulations, the coastlines of French Guiana, Martinique, Guadeloupe, and Saint-Pierre-et-Miquelon are assigned to Region B.
Do not assume that the system is determined by the nationality of your boat. It depends on the waters where you are navigating.
What does the conventional direction of buoyage mean?
Lateral marks make sense only when interpreted in the correct direction.
The conventional direction of buoyage is generally the direction taken when approaching a harbour, river, estuary, or other waterway from seaward. It can also be determined by the competent authority and indicated on nautical charts.
This is why the phrase “red on the right” is not universally correct. It describes the familiar Region B arrangement when returning from sea, not the lateral colour convention everywhere.
Always check the charted direction of buoyage before entering an unfamiliar channel.
3. Lateral marks: following a marked channel
Lateral marks indicate the sides of a defined channel or route. Their meaning depends on the buoyage region and the conventional direction of buoyage.
Region A: red to port, green to starboard
When proceeding in the conventional direction in Region A:
- Keep red port-hand marks on your port side.
- Keep green starboard-hand marks on your starboard side.
In metropolitan France, this is the system you will commonly encounter when entering marked channels.
Region B: green to port, red to starboard
In Region B, the lateral colours are reversed:
- Keep green port-hand marks on your port side.
- Keep red starboard-hand marks on your starboard side.
The shape conventions generally remain useful in both regions: port-hand marks are commonly cylindrical or can-shaped, while starboard-hand marks are commonly conical. However, shapes and structures can vary, so do not identify a mark from shape alone.
Preferred-channel marks
Where a channel divides, a modified lateral mark may indicate the preferred channel.
These marks use a main colour with a broad horizontal band of the opposite lateral colour. Their meaning depends on the region and on the direction of buoyage.
In Region A, a red mark with a broad green band indicates a preferred channel to starboard. A green mark with a broad red band indicates a preferred channel to port.
In Region B, the corresponding lateral colours are reversed.
When approaching a junction, check the chart to confirm which branch is preferred and whether either branch has particular depth or clearance limitations. A preferred channel mark does not guarantee that every vessel can safely use the route.
4. Cardinal marks: finding safe water around a danger
Cardinal marks indicate the direction of safe water relative to the mark. They are named north, east, south, and west.
Unlike lateral marks, cardinal marks use the same basic colours, topmarks, and light characteristics in Regions A and B.
Their appearance combines black and yellow horizontal bands with two black cones arranged in a distinctive way.
  <text color="secondary" size="sm">Black over yellow; both cones point upwards.</text>

  Navigable water lies to the north of the mark. When fitted with a light, it shows a continuous quick or very quick white light.
</box> <text color="secondary" size="sm">Black-yellow-black; cones point away from each other.</text>
Navigable water lies to the east of the mark. Its white light, when fitted, shows three quick or very quick flashes in each group.
</box> <text color="secondary" size="sm">Yellow over black; both cones point downwards.</text>
Navigable water lies to the south of the mark. Its white light, when fitted, shows six quick or very quick flashes followed by a long flash.
</box> <text color="secondary" size="sm">Yellow-black-yellow; cones point towards each other.</text>
Navigable water lies to the west of the mark. Its white light, when fitted, shows nine quick or very quick flashes in each group.
</box>How should you pass a cardinal mark?
The cardinal direction tells you where the safe water lies relative to the mark. It does not mean you can ignore the surrounding chart or pass at any distance.
For example, a north cardinal mark indicates that the safe-water side is north of the mark. If you are approaching from the south, you should navigate around it in a way that keeps you in the safe-water area indicated by the mark and chart.
Before passing, consider:
- The charted position and the extent of the danger.
- Your vessel’s draught and the available depth.
- The mark’s light characteristics if navigating at night.
- Nearby marks, traffic, current, and available manoeuvring room.
If the mark’s position or meaning is uncertain, do not guess. Cross-check with the chart and other reliable navigation information.
5. Isolated danger marks
An isolated danger mark identifies a limited danger, such as a rock or obstruction, with navigable water around it.
It is normally:
- Black with one or more broad horizontal red bands.
- Fitted with two black spherical topmarks.
- Equipped, when lit, with a white light showing a group of two flashes.
The key difference from a cardinal mark is that the isolated danger mark identifies the danger itself rather than indicating a compass direction in which to find safe water.
Although navigable water exists around the marked danger, that does not establish a universally safe passing distance. The danger’s extent and the required clearance must be assessed using the chart and relevant nautical publications.
Do not treat an isolated danger mark as an invitation to pass close by. Give the obstruction appropriate clearance for your vessel, draught, sea conditions, and the accuracy of the available information.
6. Safe water marks
Safe water marks indicate that navigable water exists all around the mark. They can identify a landfall, a fairway, or the centre of a channel.
They are generally recognisable by:
- Red and white vertical stripes.
- A single red spherical topmark, when fitted.
- A white light, when fitted, with one of the prescribed characteristics.
Unlike lateral marks, a safe water mark does not simply identify the port or starboard edge of a channel. It indicates safe water around the mark itself.
However, the term “safe water” should not be interpreted as a guarantee of sufficient depth for every boat. Your vessel’s draught, the tide, charted depths, and local hazards still matter.
7. Special marks
Special marks identify particular areas or features referred to in nautical documents. They are not primarily intended to indicate channel boundaries or ordinary navigational hazards.
They are generally yellow and may have a yellow X-shaped topmark. If a light is fitted, it is yellow.
Special marks may indicate features such as:
- An area where particular activities take place.
- A cable or pipeline area.
- A recreational or restricted area.
- An oceanographic or other special-purpose installation.
The exact meaning depends on the feature being marked and the information provided on the chart or in relevant nautical publications.
A yellow mark does not automatically mean that the water is safe to cross. Check what it represents and whether restrictions or hazards apply.
8. Emergency wreck marking buoys
A separate type of mark may be deployed to identify a newly discovered wreck or other new danger requiring urgent marking.
The standard emergency wreck marking buoy uses blue and yellow vertical stripes and, when fitted with a light, an alternating blue and yellow light characteristic.
These marks are intended to make a new danger conspicuous while permanent marking and charting arrangements are considered or implemented.
If you encounter one, do not assume that its presence means the danger’s exact extent is obvious. Follow official navigation warnings and chart information, and give the marked area appropriate clearance.
9. Reading buoy lights at night
When a buoy carries a light, its colour and rhythm can help identify the mark in darkness or poor visibility.
The key principles are:
- Lateral marks generally use red or green lights according to the applicable region and mark.
- Cardinal marks use white lights with patterns corresponding to north, east, south, or west.
- Isolated danger marks use a grouped white flashing characteristic.
- Safe water marks use prescribed white light characteristics.
- Special marks use yellow lights when fitted.
The rhythm matters. For example, the east cardinal mark uses three quick or very quick flashes, while the west cardinal mark uses nine.
Do not rely on a vague impression such as “a white flashing light” to identify a mark. Several types of marks can show white lights with different characteristics. Use the charted light description, including the flash pattern and period, to identify it.
Also remember that not every buoy is lit. The absence of a light does not necessarily mean a mark is missing or that the area is unmarked.
10. Common buoyage mistakes
Applying Region B colours in Region A
The familiar “red right returning” phrase is associated with Region B. In Region A, red lateral marks generally indicate the port-hand side when proceeding in the conventional direction of buoyage.
Always establish the region before interpreting lateral marks.
Ignoring the direction of buoyage
A mark’s port or starboard meaning depends on the conventional direction of buoyage. That direction is usually shown on the chart or established by the relevant authority.
Do not assume that every channel should be interpreted simply by heading towards land.
Confusing cardinal and isolated danger marks
Both can have black and yellow or black and red elements, but their meanings differ. Cardinal marks show where navigable water lies in a compass direction; isolated danger marks identify a limited hazard.
Learn their colour patterns and topmarks together.
Assuming all water around a buoy is safe
A cardinal mark indicates the direction of safe water. An isolated danger mark has navigable water around it. Neither removes the need to check charted depths, hazards, and appropriate passing distances.
Relying on colour alone
At night, in poor light, or when viewing a mark from a distance, colours can be difficult to distinguish. Use shape, topmark, light rhythm, charted position, and context together.
Treating a buoy as a substitute for a chart
Buoys can be moved, damaged, unlit, or temporarily absent. Always use current nautical charts and relevant navigation warnings as part of your passage planning.
11. A practical checklist before entering a marked channel
Before entering an unfamiliar harbour or channel, use this checklist as a reminder:
- Check the latest chart and identify the conventional direction of buoyage.
- Confirm whether the area uses IALA Region A or Region B.
- Identify the port-hand and starboard-hand lateral marks.
- Check for preferred-channel marks at junctions.
- Identify nearby cardinal marks and the direction of safe water.
- Locate isolated dangers, shallow areas, and other charted hazards.
- Check the charted characteristics of relevant lights if navigating at night.
- Confirm that the channel has adequate depth and width for your vessel.
- Consider tide, current, wind, traffic, and manoeuvring room.
- Maintain a proper lookout and safe speed throughout the approach.
12. Record your route and navigation experience
Learning to interpret buoys becomes easier with practice. After a trip, reviewing your route and noting unfamiliar marks or challenging approaches can help you prepare for future passages.
With Skipper, you can record trips on your iPhone, keep a GPS track, and add details such as locations, weather, notes, and photos. Over time, your trip history can help you remember where you navigated and reflect on the conditions you encountered.
A digital logbook supports record-keeping and learning. It does not replace current nautical charts, official navigation warnings, or the need to maintain a proper lookout.
Frequently asked questions
What is the difference between IALA Region A and Region B?
The main difference is the colour of lateral marks. In Region A, red marks generally indicate the port-hand side and green marks the starboard-hand side when proceeding in the conventional direction of buoyage. In Region B, these colours are reversed. Cardinal, isolated danger, safe water, and special marks follow the same basic system in both regions.
Which IALA region is used in France?
Metropolitan France uses Region A. Some French overseas coastlines use Region B, including French Guiana, Martinique, Guadeloupe, and Saint-Pierre-et-Miquelon. Check the applicable charts and local information before navigating.
What does a red buoy mean?
It depends on the region and mark type. In Region A, a red lateral mark generally indicates the port-hand side of a channel in the conventional direction of buoyage. In Region B, a red lateral mark generally indicates the starboard-hand side. Red-and-white safe water marks have a different meaning.
What does a black-and-yellow buoy mean?
It may be a cardinal mark. The pattern of black and yellow bands and the arrangement of the two black cones identify whether it is a north, east, south, or west cardinal mark. The mark indicates the compass direction in which navigable water lies.
What is the difference between an isolated danger mark and a cardinal mark?
An isolated danger mark identifies a limited hazard with navigable water around it. A cardinal mark indicates the direction of safe water relative to a danger. The marks have different colour patterns, topmarks, and light characteristics.
Can I pass close to a cardinal buoy?
The mark indicates the direction of safe water, not a universal passing distance. Consult the chart, identify the extent of nearby hazards, and leave sufficient clearance for your vessel and the conditions.
Do all buoys have lights?
No. Some marks are unlit. When a light is fitted, its colour and rhythm provide additional identification information. Always consult the charted characteristics rather than assuming that every buoy has a light.
Conclusion
The IALA buoyage system gives boaters a common way to interpret marked channels and hazards. Start by identifying the applicable region, then learn the lateral colours, cardinal patterns, and distinctive characteristics of isolated danger, safe water, and special marks.
Most importantly, interpret each mark in context. Check the direction of buoyage, consult current charts, account for your vessel’s draught and the conditions, and maintain a proper lookout. Buoys are essential aids to navigation, but safe passage depends on combining them with sound navigation practices.
Remember your days at sea
Skipper is a ship’s log app for sailboats and powerboats, available on iPhone and iPad. It records every trip with GPS and keeps your whole sailing history in one searchable logbook. Free for your first three trips.

Keep reading
Boat Navigation Lights Explained
Learn how to identify boat navigation lights, understand what they reveal about a vessel, and recognise the lights required at night and in restricted visibility.
All boaters
COLREGs: International Collision Regulations Explained
Understand the COLREGs, the international rules for preventing collisions at sea, including right of way, lookout, safe speed, navigation lights and sound signals.
All boaters
How to Plan a Sailing Route
Learn how to plan a sailing route using nautical charts, waypoints, distance calculations, weather forecasts, tides, and alternative destinations.
All boaters