 Skipper
Prepare
•All boatersHow to Plan a Sailing Route
Learn how to plan a sailing route using nautical charts, waypoints, distance calculations, weather forecasts, tides, and alternative destinations.
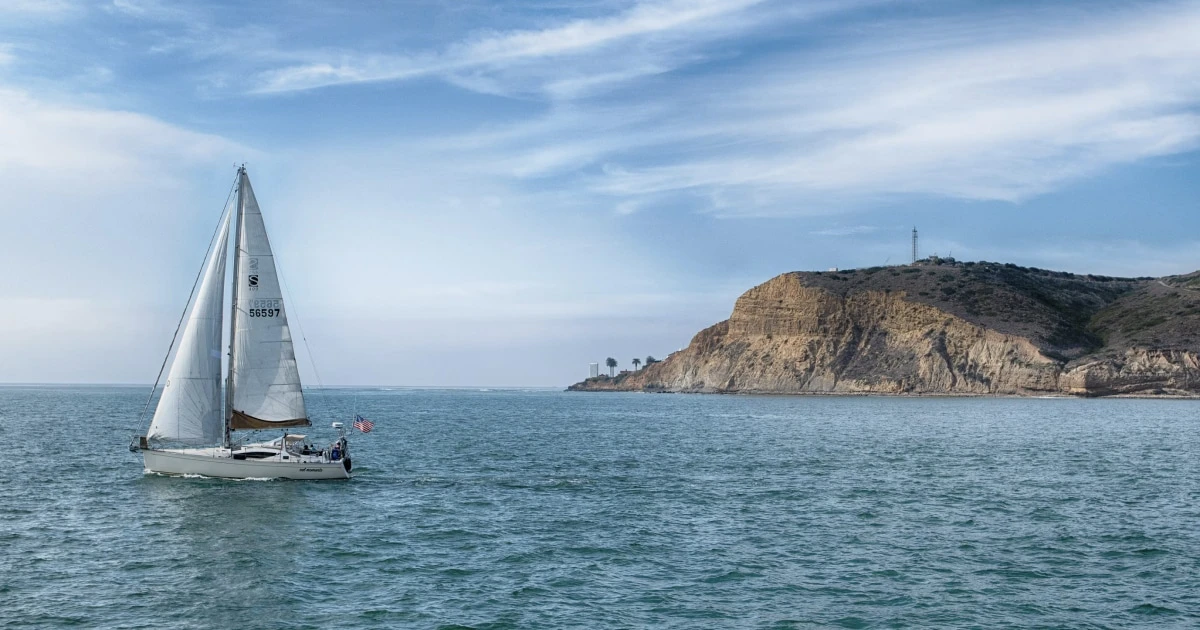
How to Plan a Sailing Route
Planning a sailing route means more than drawing a line between your departure point and destination. You need to identify navigable water, assess hazards, estimate sailing time, understand weather and tidal constraints, and decide where you can go if the original plan becomes unsuitable.
The process applies to a short coastal sail as well as a multi-day passage. The level of detail changes with the distance, complexity, boat, and crew, but the underlying principle stays the same: know where you intend to go, understand the constraints along the way, and prepare alternatives.
This guide explains how to plan a sailing route step by step.
1. Define your departure point and destination
Start by identifying your departure point and intended destination.
For a short coastal trip, these might be two harbours or anchorages. For a longer passage, you may need intermediate stops, overnight destinations, or several possible arrival ports.
Before choosing a route, establish:
- Your departure location and intended destination.
- The boat’s draft and relevant handling limitations.
- The intended departure date and approximate time.
- Whether the journey needs to be completed in daylight.
- Any tidal windows or access restrictions.
- The crew’s experience and the expected conditions.
- Whether you need to stop along the way.
Consider the destination itself, not just the distance to it. A harbour entrance may be difficult in certain conditions, an anchorage may offer shelter only from particular wind directions, or a narrow channel may be practical only at suitable water levels.
If you’re still deciding where to go, begin with the broader process described in How to Plan a Sailing Trip. This article focuses on turning that decision into a workable route.
2. Start with current nautical charts
Nautical charts are fundamental to route planning. They provide navigational information that ordinary road maps and general-purpose maps do not.
Use charts suitable for your intended area and level of navigation. Depending on the route, you may need both a general chart of the region and more detailed charts for coastal approaches, channels, anchorages, or harbour entrances.
Review the chart for:
- Depths and depth contours: Check whether the water is deep enough for your boat, accounting for the relevant chart datum and water-level conditions.
- Shoals and underwater hazards: Identify areas where grounding could occur.
- Rocks and reefs: Check the positions of charted dangers.
- Navigation marks: Understand the buoys, beacons, lights, and other aids relevant to your route.
- Restricted areas: Identify areas where navigation may be prohibited or subject to conditions.
- Traffic constraints: Consider shipping lanes, ferry routes, and other areas requiring particular attention.
- Overhead obstructions: Check bridge clearances and overhead cables where relevant.
- Harbour approaches: Review channels, entrance depths, and any specific local navigation guidance.
Also consult current nautical publications, notices to mariners, and relevant local information. Charts and navigation data can change, and a route planned from outdated information may no longer be suitable.
For example, a route that looks direct on a small-scale chart may cross shallow water or pass too close to a hazard when examined in greater detail.
Do not treat a route displayed on a screen as proof that the entire route is safe. You remain responsible for checking the navigational information and assessing whether the route is appropriate for your vessel and conditions.
3. Break the route into waypoints
A waypoint is a defined geographical position used as a reference during navigation. A route typically consists of a sequence of waypoints connected by legs.
Instead of planning only a departure point and destination, identify the important positions your boat should pass along the way.
Waypoints may mark:
- A turning point along the coast.
- A safe passage around a headland.
- A channel entrance or exit.
- A position before approaching a harbour.
- A point where the route changes direction to avoid a hazard.
- An intermediate destination or planned stopping point.
Each waypoint should have a clear purpose. Avoid adding unnecessary points simply to make the route appear more detailed.
Example: Planning a coastal route
Imagine you’re sailing from Harbour A to Harbour B along a coastline with a rocky headland between them.
A simple plan might include:
- Departure: Leave Harbour A and establish your initial course.
- Approach waypoint: Reach a position before the headland where you can reassess conditions and traffic.
- Passing waypoint: Follow a navigable route around the headland, keeping clear of charted hazards.
- Coastal waypoint: Continue toward Harbour B while monitoring conditions and navigation.
- Arrival waypoint: Prepare for the harbour approach using the relevant detailed chart and local information.
The actual positions depend on the charts, hazards, vessel, and conditions. These waypoints are a planning structure, not navigational coordinates to copy.
Don’t place waypoints too close to hazards
A waypoint should not merely sit on the edge of a danger. Leave an appropriate margin from rocks, shoals, restricted areas, and other hazards, taking account of chart accuracy, the boat’s position uncertainty, sea room, and the conditions.
Also consider what happens between waypoints. A route is not safe simply because its turning points are in safe water.
4. Calculate the distance of each leg
Once you’ve established the waypoints, calculate the distance of each leg and add them together.
Nautical distances are expressed in nautical miles (NM). Boat speed is commonly expressed in knots, where one knot equals one nautical mile per hour.
For example, a hypothetical route could contain three legs:
| Route leg | Planned distance |
|---|---|
| Departure to waypoint 1 | 6 NM |
| Waypoint 1 to waypoint 2 | 8 NM |
| Waypoint 2 to destination | 5 NM |
| Total | 19 NM |
The planned route is 19 nautical miles long, equivalent to approximately 21.9 statute miles (mi).
These distances are illustrative. For a real passage, calculate the legs using suitable nautical charts or a navigation tool, and verify that the route follows navigable water.
Why the shortest route isn’t always the best
The direct distance between two points may be shorter than the distance of a practical sailing route. A longer route may be preferable because it:
- Avoids shallow water or underwater hazards.
- Keeps you clear of restricted areas.
- Uses a suitable channel or harbour approach.
- Reduces exposure to adverse conditions.
- Takes advantage of favourable tidal streams where appropriate.
- Provides better options for stopping or seeking shelter.
The goal is not necessarily to minimise distance. It’s to select a route that is appropriate for the boat, crew, conditions, and destination.
5. Estimate the time needed to sail the route
After calculating the distance, estimate how long each leg is likely to take.
The basic calculation is:
Sailing time = distance in nautical miles ÷ average speed in knots
Suppose a leg is 12 nautical miles and you expect to average 4 knots:
12 NM ÷ 4 knots = 3 hours.
For a route with several legs, calculate the time for each one and add the results.
However, the estimate is only useful if the assumed average speed is realistic. Boat speed varies with wind angle, sail configuration, sea state, current, manoeuvres, and the vessel itself.
Allow additional time for:
- Tacking or gybing.
- Manoeuvring around hazards or traffic.
- Waiting for a tidal window.
- Entering and leaving harbours.
- Reducing sail or handling changing weather.
- Unexpected delays.
For a longer passage, also consider daylight, crew fatigue, rest requirements, and the consequences of arriving later than planned.
Avoid planning an arrival time that leaves no margin for delays. If a harbour entrance, tidal gate, or other constraint imposes a timing limit, work backwards from that constraint and verify the plan carefully.
6. Account for wind, tides, and currents
A route that looks suitable on a chart may be difficult or impractical in the expected conditions.
Check the forecast for the intended departure time and the period during which you’ll be underway. Assess wind direction and strength, gusts, sea state, visibility, and the potential for significant changes.
Wind direction and sailing angles
A sailboat cannot normally sail directly into the wind. If your destination lies upwind, you may need to tack, increasing the distance sailed and the time required.
A direct line on a chart therefore doesn’t necessarily represent the route the boat will actually sail.
When estimating the time for an upwind leg, account for the likely sailing angles and the extra distance associated with tacking.
Tides and tidal streams
Tides can affect both the depth of water available and the timing of a route. Tidal streams can also influence your speed over the ground and the time required to reach a destination.
Check tidal predictions and current information for the locations and times that matter to your route. Pay particular attention to:
- Shallow entrances and channels.
- Narrow passages with strong currents.
- Tidal gates that must be passed within a suitable window.
- Areas where wind against tide may create uncomfortable or hazardous seas.
- Routes where current could significantly affect progress.
Do not assume that a favourable current will remain favourable throughout a leg. Its direction and strength may change with time and location.
For more background, read Tides and Currents Explained.
Reassess the route if conditions change
A route planned in one set of conditions may no longer be appropriate after a change in wind, visibility, sea state, or tidal timing.
Before departure, identify the conditions that would lead you to alter the route, delay, seek shelter, or turn back. While underway, compare actual conditions with the forecast and adjust the plan when needed.
See How to Read Wind Conditions for Sailing for more detail on interpreting wind forecasts.
7. Identify hazards and navigation constraints along the route
Review the entire route, not just the departure and arrival areas.
For every leg, ask what could make the planned track unsuitable or require a change of course.
Depending on the area, consider:
- Rocks, reefs, and shallow patches.
- Strong tidal streams or overfalls.
- Narrow channels and confined waters.
- Commercial shipping and ferry traffic.
- Traffic separation schemes.
- Restricted or prohibited areas.
- Fishing activity or charted obstructions.
- Bridges and overhead cables.
- Limited visibility or difficult pilotage.
- Harbour access restrictions and local navigation requirements.
Also consider the sea room available if the boat needs to manoeuvre. A route close to a lee shore, for example, may leave fewer options if the wind strengthens or the boat experiences a technical problem.
Use current charts and appropriate nautical publications to assess these risks. Local pilotage information can be especially valuable when approaching unfamiliar harbours, rivers, or narrow passages.
8. Plan alternative routes and places of refuge
A good route plan includes alternatives.
Your intended destination may become unsuitable because of deteriorating weather, a delay, a change in tidal conditions, equipment trouble, or an unexpected obstruction.
Identify alternatives before departure rather than waiting until you’re already under pressure.
For each significant section of the route, consider:
- A suitable port or anchorage nearby.
- A route that avoids an exposed headland or difficult passage.
- A way to shorten the trip.
- A safe option for returning to the departure point, if appropriate.
- The conditions under which you would use each alternative.
Check whether these alternatives are genuinely suitable. An anchorage that offers shelter in one wind direction may be exposed in another, and a port may have access restrictions or limited availability.
Don’t rely on an alternative merely because it is geographically close. It must be appropriate for the boat, conditions, and situation.
9. Prepare for the harbour approach
The final part of a route can be more demanding than the open-water leg.
Harbour entrances may involve narrow channels, shallow areas, strong currents, traffic, navigation marks, or local procedures. Conditions can also change quickly near headlands and entrances.
Before approaching your destination:
- Review the relevant detailed chart and local pilotage information.
- Check the entrance’s depths, navigation marks, and any restrictions.
- Confirm whether tidal conditions affect access.
- Assess wind, current, visibility, and traffic.
- Prepare the crew for the manoeuvre.
- Reassess whether the intended destination remains suitable.
Avoid leaving harbour research until the last few minutes of the passage. The approach should already be part of your plan.
If the entrance is unfamiliar or conditions are unsuitable, consider an appropriate alternative rather than pressing on simply because the destination was in the original itinerary.
10. Use electronic navigation tools carefully
Electronic chart plotters and navigation apps can make route planning more convenient. Depending on the tool, they may allow you to plot waypoints, measure distances, estimate times, and monitor your position relative to the planned route.
But digital tools have limitations. Chart coverage, data quality, device performance, settings, and user familiarity all matter.
Before relying on a system:
- Confirm that the charts and navigation data are suitable and current.
- Understand how the system displays hazards, depths, and route information.
- Check the planned route against the underlying chart.
- Make sure the waypoints and route legs are where you intended them to be.
- Understand the limitations of the device and software.
- Have an appropriate alternative means of checking your position and navigating if the primary system fails.
A phone can be useful, but battery life, water exposure, visibility, reception assumptions, and device failure all need to be considered. Do not confuse a GPS track recorder with a complete navigation system.
For broader guidance, the Royal Yachting Association’s passage-planning guidance explains why route planning should account for hazards, tides, weather, delays, and places of refuge.
11. Compare the planned route with the actual passage
Once you return, comparing the planned route with what actually happened can help you improve future planning.
Useful details include:
- The route and distance actually covered.
- Departure and arrival times.
- Actual average speed and duration.
- Weather and sea conditions.
- Changes to the intended route.
- Delays, stops, and reasons for changing the plan.
- Navigation challenges or unexpected hazards.
For example, you might discover that a leg consistently takes longer than expected because of the prevailing wind, a tidal stream, or manoeuvres near a headland. That information can help you make better estimates next time.
A sailing logbook is useful for preserving this information. Skipper, the iPhone digital sailing logbook, records GPS tracks, routes, distance, duration, and speed, and lets you add locations, weather, crew details, notes, and photos. You can review past trips on maps and use your sailing history to understand how your passages develop over time.
Skipper helps document the passage; it does not replace nautical charts, weather forecasts, or navigation equipment.
Learn more about What to Write in a Sailing Logbook.
Sailing Route Planning Checklist
Use this checklist when preparing a route. Adapt it to the boat, destination, crew, and complexity of the passage.
Route and charts
- Confirm the departure point and destination.
- Select suitable, up-to-date nautical charts.
- Identify hazards, shallow areas, and restricted zones.
- Plot meaningful waypoints and review every leg.
- Check harbour approaches and local navigation information.
- Calculate the total route distance.
Timing and conditions
- Estimate the time for each leg using realistic average speeds.
- Allow for tacking, manoeuvres, and possible delays.
- Check the weather forecast for the planned period.
- Review tides, currents, and tidal windows where relevant.
- Consider daylight and arrival constraints.
- Identify conditions that would require a route change.
Contingencies and navigation
- Identify alternative destinations and places of refuge.
- Check that alternatives are suitable in the expected conditions.
- Verify the route in your navigation system.
- Prepare an appropriate backup for navigation.
- Share the intended passage plan with someone ashore.
- Reassess the route before departure and while underway.
For a broader preparation checklist covering the boat and crew, see the Sailing Passage Checklist.
Frequently Asked Questions
How do you plan a sailing route?
Start with the departure point and destination, then review current nautical charts and identify navigational hazards. Break the route into waypoints, calculate the distance of each leg, estimate sailing times, and assess weather, tides, and currents. Finally, identify alternative routes and places of refuge.
What is a waypoint in sailing?
A waypoint is a defined geographical position used as a reference during navigation. Several waypoints can form a route, marking turning points, safe passages, channel entrances, or other important positions.
Waypoints should be selected using appropriate navigational information and should not be treated as a guarantee that the water between them is safe.
How do you calculate sailing time?
Divide the distance in nautical miles by your expected average speed in knots. For example, 15 nautical miles at an average of 5 knots gives an estimated sailing time of 3 hours.
Then account for factors such as tacking, currents, manoeuvres, traffic, and delays. The result is a planning estimate rather than a guaranteed arrival time.
Is the shortest sailing route always the best?
No. A longer route may be more appropriate if it avoids hazards, shallow water, restricted areas, or unsuitable conditions. It may also provide better shelter options or fit the tidal constraints more effectively.
Choose a route based on safety and suitability, not distance alone.
Can I plan a sailing route on my iPhone?
You can use an iPhone to research a route and, with suitable navigation software and charts, help plan and monitor a passage. You should understand the tool’s capabilities and limitations and have an appropriate backup.
Skipper is designed to record sailing trips, including GPS tracks and trip statistics. It complements route planning by helping you document the passage and review what happened afterward; it should not be treated as a substitute for navigation software.
What is the difference between a sailing route and a GPS track?
A route is the path you intend to follow, often defined by waypoints. A GPS track records the positions a vessel actually travels over time.
Comparing the two can show where you deviated from the original plan and help explain the difference between the intended passage and the one you completed.
Plan the route. Record the passage.
A well-planned sailing route combines suitable charts, sensible waypoints, realistic timing, weather and tidal awareness, and alternative destinations. It gives you a clear starting point while leaving room to adapt when conditions change.
After the passage, record what actually happened. Reviewing your tracks, distances, timings, and observations can help you build a more accurate picture of your sailing over time.
Use Skipper to keep a record of every passage. Track your sailing routes, revisit your trips on a map, and bring together the details, conditions, notes, and photos that make each journey worth remembering.
Remember your days at sea
Skipper is a ship’s log app for sailboats and powerboats, available on iPhone and iPad. It records every trip with GPS and keeps your whole sailing history in one searchable logbook. Free for your first three trips.

Keep reading
How to Plan a Sailing Trip
Learn how to plan a sailing trip, from choosing your destination and checking the weather to preparing your boat, crew, route, and backup plans.
All boaters
How to Read Wind Conditions for Sailing
Learn how to read wind forecasts for sailing, understand knots and gusts, assess wind direction and sea state, and decide when conditions are suitable for your boat and crew.
All boaters
Sailing Passage Checklist: Plan a Safe Passage
Prepare for a sailing passage with this detailed checklist covering route planning, weather, tides, boat systems, safety equipment, crew, watches, provisions, and contingencies.
All boaters